How to Make Pumpkin Puree from A Fresh Pumpkin

This post may contain affiliate links. As an Amazon Associate, I earn from qualifying purchases at no extra cost to you.

Making your own pumpkin puree is almost as easy as opening a can of pumpkin puree, but it tastes fresher and only requires one ingredient: a pumpkin. Roast it, scoop out the flesh, and blend until smooth. Once you see how to make pumpkin puree from scratch, you might never reach for the canned stuff again. There’s no sugar or spice in homemade pumpkin puree, so it works in a pot of chili just as well as it does in a pie.

Recipe Highlights
- Simple: Easy to make with only one ingredient.
- Easy to Freeze: Divide into individual portions so it’s ready to use in your favorite pumpkin recipes.
- Versatile: Use it in your favorite pumpkin recipes, savory or sweet: soup, chili, pasta sauce, mac and cheese, oatmeal.
The Best Pumpkin to Use for Homemade Pumpkin Puree
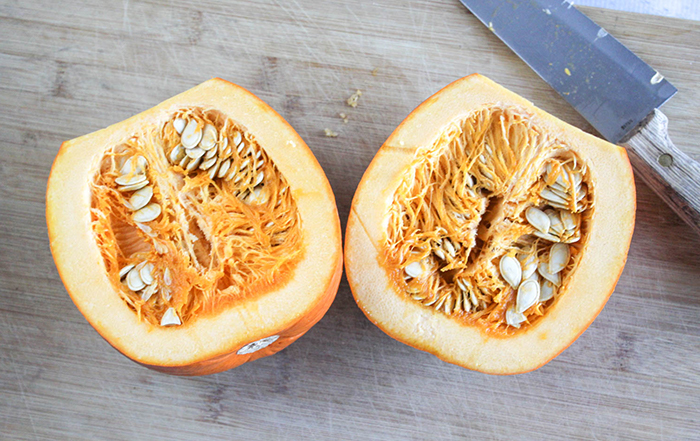
- Pie pumpkin. Pie pumpkins, also known as sugar pumpkins, are the ones to use for pumpkin puree. They’re smaller, denser and sweeter than jack o’ lantern pumpkins (carving pumpkins). When you’re picking one out, look for a pumpkin that weighs 2 to 3 pounds. It will look smaller than a carving pumpkin of the same weight because it’s so dense.
- Other varieties. If your farm stand or supermarket has Cheese, Cinderella or kabocha pumpkins, those make a smooth, sweet puree too.
- Carving pumpkins. They’ll work in a pinch, but the flesh is stringy, watery and pretty bland. I’d only use one for soup or chili, and I’d drain it first.
- Pumpkin Substitute: if pumpkin isn’t available, try roasting winter squash such as acorn or butternut squash instead. You’ll get a smooth puree that tastes very similar.
How to Make Fresh Pumpkin Puree
- Cut the pumpkin. Put the pumpkin on a damp kitchen towel so it doesn’t slide around, and cut off the stem. Then push the tip of your knife in next to where the stem was and cut down one side, then the other. If it’s really hard to cut, poke a few holes in the skin and microwave the whole pumpkin for 2 to 3 minutes to soften it up. Scoop out the seeds. It’s ok to leave the stringy bits that are hard to get out; they blend right in.
- Roast. Preheat the oven to 400°F. For easy clean-up, line the pan with parchment paper. Place the pumpkin halves cut side down, which keeps the steam in so the flesh cooks soft. Bake for about 45 minutes, until a fork slides in easily.
- Scoop. Once the roasted pumpkin is cool enough to handle, flip the halves over and use a spoon to scoop the flesh away from the skin.
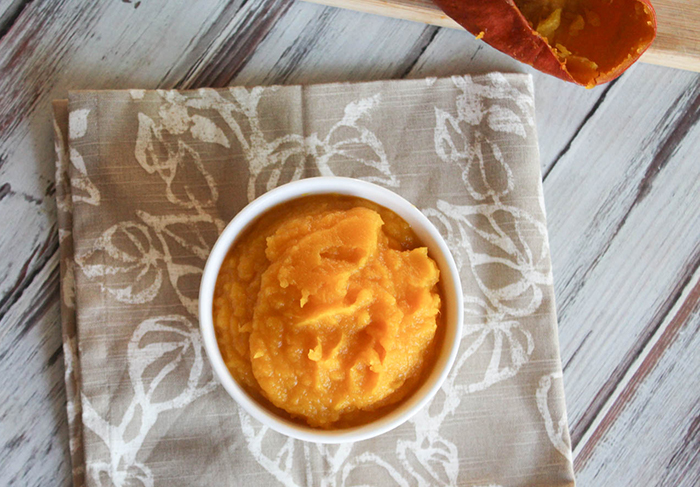
- Blend. Put the flesh in a food processor or blender and blend until it’s smooth.
Quick Pumpkin Puree Tips
You don’t need special equipment or even an oven to make homemade pumpkin puree. There are a few easy ways to adjust the process depending on what you have in your kitchen, and a little extra moisture isn’t a problem for most savory recipes.
Blender, Food Processor or Not Blender at All
A food processor gives you the smoothest puree, and you don’t have to add any water. A blender works too, especially a high-speed one. Just blend in batches and scrape down the sides. If it gets stuck, add a tablespoon of water at a time.
If you don’t have a blender or food processor, you can use an immersion blender or a potato masher. Put the pumpkin in a deep bowl and mash or blend it right there. A mashed puree isn’t quite as smooth, but nobody will notice in soup or chili.
Alternative Cooking Method: Steam the Pumpkin
If you don’t want to heat up your oven, you can make it on top of the stove too. Peel the pumpkin, cut it into chunks, and steam them in a covered pot with a steamer basket for about 15 to 20 minutes, until they’re fork tender. Then blend or mash. Steamed pumpkin is a little wetter than roasted, so you may want to drain it.
If your Puree is Watery
Some pumpkins are just wetter than others. Line a strainer with a paper towel or cheesecloth, set it over a bowl, and let the puree drain in the fridge for an hour or so. If you’re baking with it, leave it overnight. For soup or chili, don’t worry about it.
How to Store Pumpkin Puree
Pumpkin puree will last for up to 5 days in the refrigerator in an airtight container.
Pumpkin puree also freezes well. I like to freeze it in half or full-cup portions souper cubes are great for this. You can also store it in freezer bags or ice cube trays for small portions. Pumpkin puree will last in the freezer for up to 3 months.
To thaw it, move it to the fridge the night before, or just drop it frozen into soup, chili or sauce. If you’re baking with it, pour off any water that separates.
How to Use Pumpkin Puree
There are so many different ways to use pumpkin puree from sweet to savory. I like to stir it into Greek yogurt for breakfast. It’s also good with applesauce or oatmeal. Spread it on your toast, mash it into your potatoes, and use equal parts of pumpkin puree and ricotta cheese for a delicious pasta sauce.
My favorite pumpkin recipes are pumpkin sage pasta and pumpkin pie hummus, which tastes like pumpkin pie without the crust.
Want to Save This Recipe?
Enter your email & I’ll send it to your inbox. Plus, get great new recipes from me every week!
By submitting this form, you consent to receive emails from Simple and Savory
Click on serving size to scale this recipe
How to Make Pumpkin Puree From Scratch
Ingredients
- 1 pumpkin
Instructions
- Pre-heat the oven to 400
- Cut the pumpkin in half with a sharp knife scoop out the seeds
- Place the pumpkin halves into a baking sheet skin side up
- Bake for approximately 45 minutes until the skin turns dark and a fork can easily be inserted
- Remove the pumpkin halves from the oven and let them sit for 15 minutes to cool off
- Use a spoon to scoop out the flesh and place it in a food processor or high-speed blender
- Blend the pumpkin into a puree and store it in the refrigerator or freeze it.
Video
Nutrition
Nutrition information provided is an estimate and can vary based on cooking methods and ingredients used
Check out more of our Plant-Based Recipes here!
Sign Up for Easy Recipes Straight in Your In-Box!